

Whether you are clearing space for a new garden or pasture, cleaning up after a storm or just after firewood. Knowing how to safely fell a tree is important.
Safety First
For every one of you that says you don’t need any of the following safety gear, I can tell you stories of people I know personally that thought the same and lived to regret it. Many of these things you should already have on hand since they are pretty universal for safety.
Safety gear:
- Eye protection: Safety glasses or better yet a full face shield that attaches to your hard hat. Protecting your eyes is the most important thing. However, trust me on this, taking a splinter to the cheek is no picnic.
- Hard hat: To provide protection from falling branches
- Ear Protection: If you are going to be using a chainsaw this is very important.
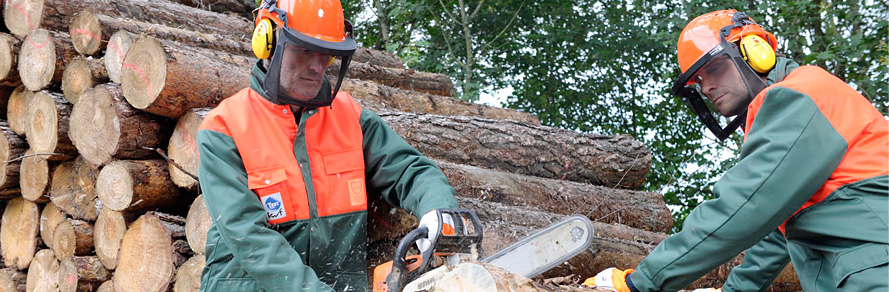
- Leather gloves, and climbing gloves if you are planning to climb
- Leather steel-toed boots that provide ankle protection
- Chainsaw chaps or pants – if you plan to use a chainsaw, not strictly necessary if you aren’t. Warning: these will not protect you from an axe strike.
- First Aid kit that includes a tourniquet. Plus the knowledge of when and how to apply one properly.
Axe vs. Chainsaw
A chainsaw is faster and requires less effort on your part, but they are also more expensive, noisy, and require more maintenance in terms of chain sharpening, oil, and gas.
A felling axe is cheaper than a chainsaw, although a top-notch felling axe can cost as much as a small chain saw. An axe is the best choice if you are cutting low to the ground, as dirt and a chainsaw are not a good mix, but it doesn’t matter if you use an axe to chop roots. And of course it excels at splitting wood with the grain.
A chainsaw is great for big jobs, like clearing space for a pasture or felling and bucking trees (cutting them to length for firewood) but it isn’t necessary for smaller jobs such as taking out just a few smaller trees.
Sometimes people will use an axe to take down a tree or two and then a rough cut hand saw to buck them for firewood. And some of us have done the seemingly impossible and cut down a large Douglas fir with just a pruning saw – which we really do not recommend doing.
Getting started
Whether you are using a chain saw to cut firewood, trim trees or harvest large timber, you will be performing three basic operations: felling, limbing and bucking. Felling involves cutting a standing tree and dropping it in the place you want it. Limbing is the removal of the branches from either standing or downed trees. Bucking is the process of cutting a downed tree into appropriate lengths.
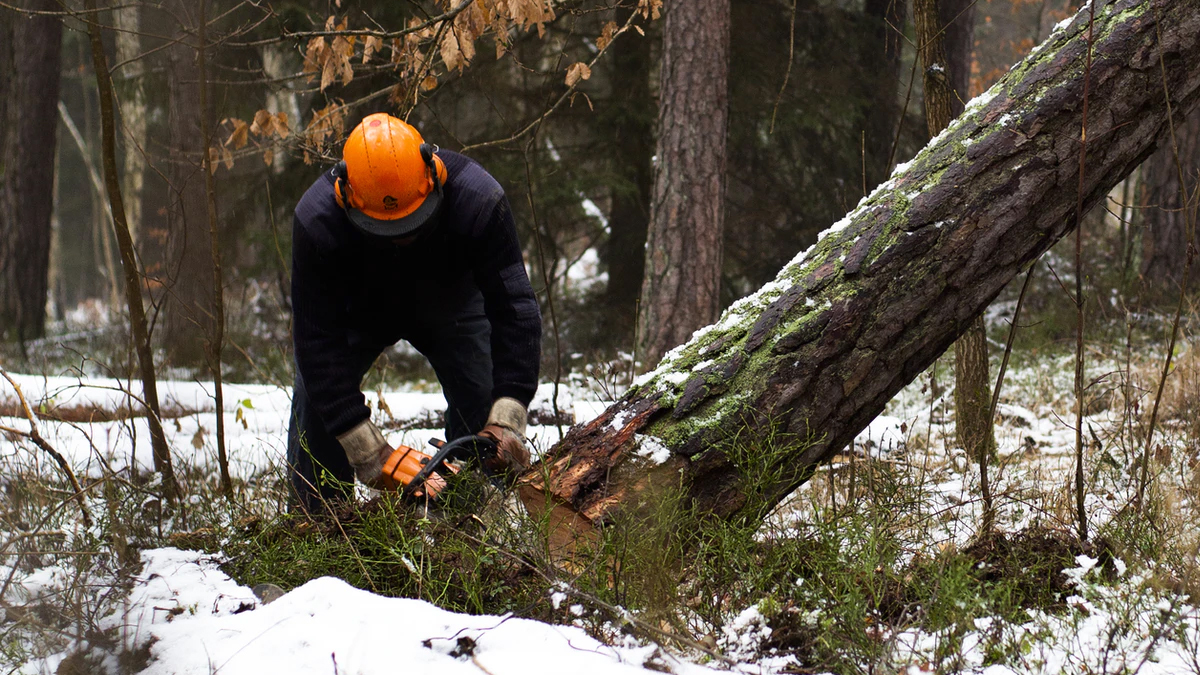
Felling a tree can literally make or break your day. Landing a tree where you want it facilitates the rest of your operations. Many people cutting firewood have dropped trees on their pickup trucks.
Examine the tree and its surroundings
Note any uneven distribution of branches in the tree crown, lean of the trunk and signs of rot or decay. Inexperienced tree cutters should never attempt to cut trees that are decayed or rotted inside or that are leaning or otherwise under tension. Such trees are at greater risk of snapping or splitting while being cut, which could cause serious or fatal injury to the cutter or bystanders.
If power lines are in the vicinity of the tree, do not attempt to fell the tree unless you are absolutely certain that doing so will not interfere with them. If the tree must be removed and you suspect felling it will affect a power line, call the power company. They will have the expertise and equipment to remove the tree safely.
Examine the tree for loose, dead limbs. Loose limbs that fall onto the tree cutter are a common cause of serious injuries and fatalities. Remove loose limbs before felling, if possible. If that’s not possible, fell the tree from a position where the limbs could not strike you if dislodged.
Note the position of nearby trees. Be sure that the tree you are felling can fall all the way to the ground. A lodged tree is very dangerous. Experienced loggers are often killed by felled trees that hang up or snag in adjacent trees. A tree spring-back from the weight of a falling tree can whip a broken limb toward the cutter or bystanders with tremendous speed.
Plan two escape paths
Plan two escape paths (B) opposite the planned direction of the fall of the tree (A) and at about a 45 angle from each other (Figure 1). Remove all obstacles from the paths. Place all tools and equipment a safe distance away from the tree but not on the escape paths. Select a place to set the chain saw in case of emergency. Never run while holding a chain saw, operating or not. Rather, turn off the chain saw and set it down before making your escape.
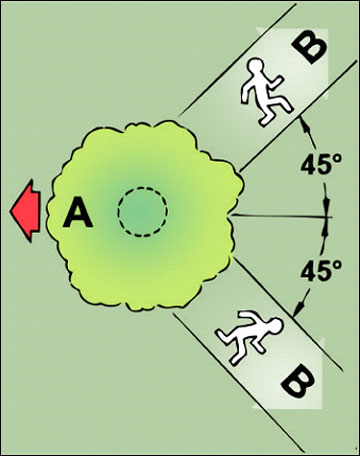
Clear the paths of all obstacles before making your first cut.
Timber!
Make the cut
Clear a safe work area around the base of the tree. Remove limbs, underbrush and other obstructions, being sure to keep your escape paths clear.
Ensure all bystanders are a safe distance from the base of the tree to be felled, at least 1-1/2 times the height of the tree, before the first cut is made.
For trees 6 inches in diameter or less, make one cut through the trunk. For larger diameter trees, the inexperienced chain saw operator should make two basic cuts: the undercut and the back cut. Advanced cutting techniques, such as plunge cutting, should only be done by experienced, professional loggers.
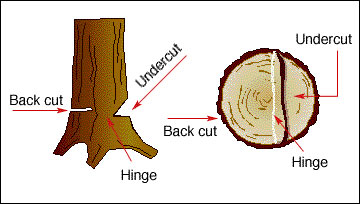
Undercut
The undercut serves as the guiding or aiming slot for the tree. Basically, it is a V-shaped notch placed on the side of the tree in the direction of falling. Either a standard undercut or a reverse undercut can be used. Typically the first cut is made parallel to the ground and then the slanting cut is made.
A modified undercut known as an open-faced undercut has become popular in many areas.. Introduced by Scandinavian felling specialists, this cut is easier to make, provides good guidance, and has additional safety features. Instead of ending up with a 45-degree opening, the undercut provides a nearly 90-degree opening. When the tree starts to fall, this modified undercut allows additional room for the tree to fall before the top and bottom of the undercut come together.
For trees that are essentially straight, the depth of the undercut should be about one-fourth of the tree’s diameter.
Back cut
For all three undercuts, the back cut is made on the opposite side of the tree, slightly above the hinge point of the undercut. The back cut releases the stresses on the back of the tree, allowing the tree to fall. Never make the back cut lower than the undercut because that reverses the roles of the two cuts. Never cut through the undercut because that will cause you to lose all control over the tree.
As the saw nears the undercut, leave a small amount of wood to serve as the “hinge” or “holding” wood. The tree actually pivots on this hinge, and the width and angle of the hinge can be used to guide the direction of the tree’s fall. Because of the angled hinge, the tree will start to fall on the narrow section of the hinge while the wood at the thicker section of the hinge is still intact. The tree is therefore pulled toward the thick section. Making these cuts is an art and requires practice.
Once the tree starts to fall, turn off the saw and move down your chosen escape path. Do not stand at the base of the tree to admire your work. Falling trees have been known to bounce backward over the stump and injure an unwary operator.
A leaning tree presents special problems. The difficulty of these problems depends on the direction and the degree of the lean. With a conventional back cut, a leaning tree will quite possibly split and fall prematurely. Rather than risk potential serious injury to yourself by trying to fell a leaning tree, consult a professional arborist.
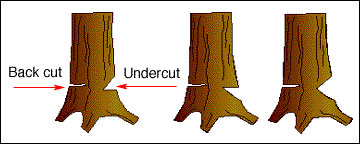
slightly (1 to 2 inches) above the hinge point of the undercut.
properly made undercuts and back cuts.
Limbing a tree
When removing unwanted limbs from standing timber, the basic safety rule is: Never limb above your shoulders; that is, do not attempt to cut off branches above the height of your shoulders. Cutting above your shoulders requires that you hold the chain saw at or near arm’s length, and you lose control over the saw in this position.
When limbing a tree that is lying on the ground, other safety rules apply. The first thing you should do is evaluate the fallen tree. If the tree has become lodged or wedged in adjacent trees and has not fallen all the way to the ground, do not walk underneath the tree. It may fall without warning. Trees that are “hung-up” are especially dangerous and need to be removed by mechanical means. They can be pulled down with a cable and a tractor suitably equipped to protect against roll-over and falling objects.
Besides checking whether the felled tree is hung-up, also consider the following questions as you survey the area:
- Do you see smaller trees that have been bent over and trapped by the felled tree?
- Do you see branches holding the tree partially in the air?
- Is the tree on level ground?
- If you have just felled the tree, are there dead branches or other debris hanging above you that may still fall to the ground?
Dead branches and debris are called widowmakers for good reason. They have been known to fall several minutes after a tree has been felled and severely injure or kill saw operators. To be safe, wait a few minutes to allow any additional debris to fall to the ground. Use the time to take a short rest.
Once you have evaluated the obstacles and hazards and are ready to limb the tree, stand on the uphill side of the tree. Never stand on the downhill side of a fallen log. If you cut a branch that is holding the log in place, the log could roll downhill and trap you. Make sure you have good footing and are standing in a balanced position that allows you freedom of movement
Start at the bottom of the tree and work your way to the top, removing branches on the opposite side of the tree from you as you go. Whenever possible, always cut on the side of the log opposite from you. This places the log between you and the saw and provides additional protection for you.
Keep sight of the tip of the saw to prevent kickback. Periodically put down the saw and remove debris so you have clear vision and movement around the tree.
Try to cut the limbs off as flush as possible with the trunk of the log. Doing this makes the log much easier to roll or move. If the limbs are in a position where flush cuts are not immediately possible, remember to remove the branch stubs later.
Depending on the species and size of the tree you are limbing, some of the branches may be very heavy. When heavy branches are removed from a log, the log may shift its position unexpectedly.
Smaller trees that are bent over and trapped by the weight of the fallen log are called spring poles. Springpoles have a tremendous amount of stored energy and present one of the greatest hazards of the limbing process. This energy can be safely removed by using an ax or chain saw to cut the spring pole at the apex of its bend. Trapped branches can also be spring poles and can be dealt with in the same way.
When cutting a tree into firewood, you may want to start at the top of the tree so that some of the branches are off the ground. That way, the wood drops to the ground and the saw is kept away from the ground as much as possible. Again, this is a time when good footing, good balance and ease of movement are especially important.
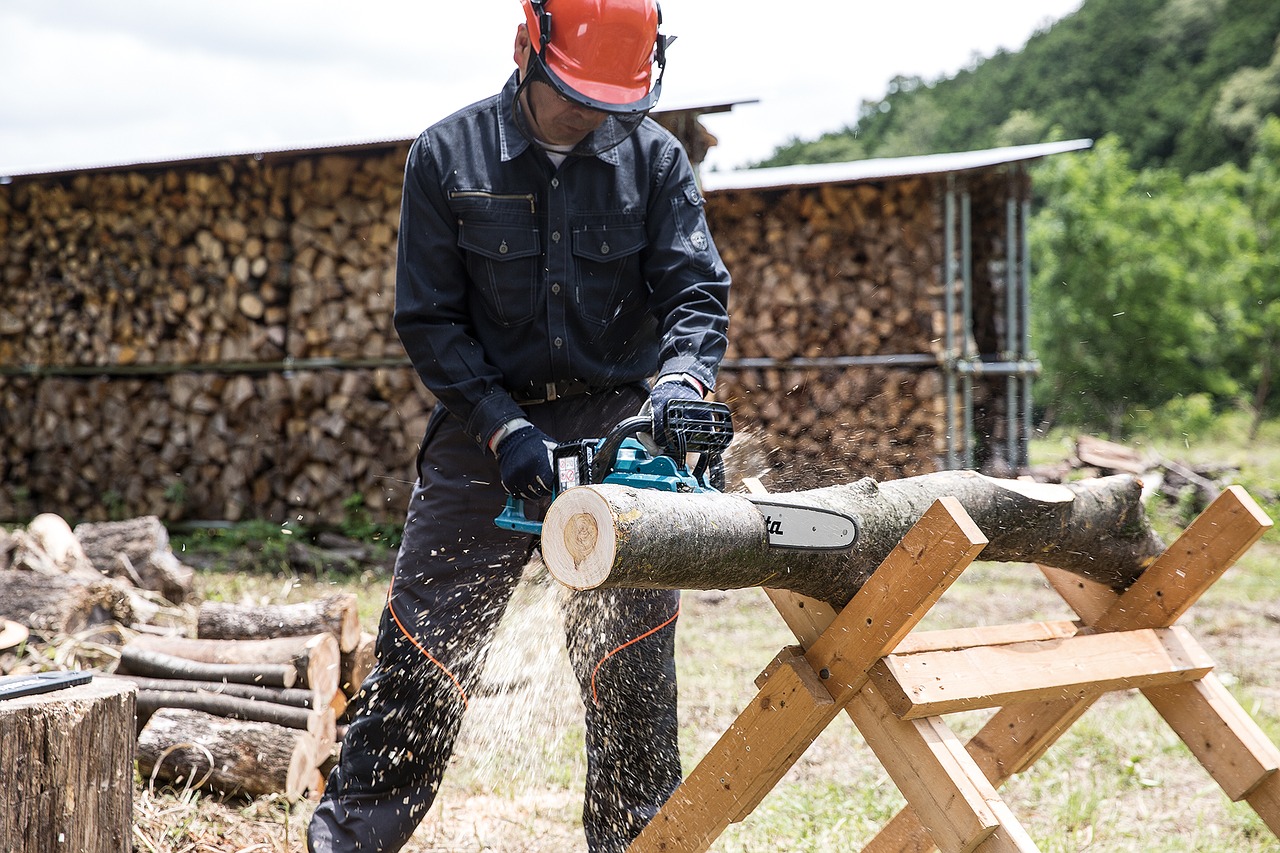
Bucking a tree
The process of cutting a tree into usable lengths is called bucking. Bucking often occurs as a tree is being limbed, such as when the limbs of the crown are to be used as firewood. When cutting firewood, make sure you know the needed length of wood before you leave home. When cutting full-size products, such as sawlogs and veneer logs, you must cut logs longer than the final product to leave a trim allowance. For an 8-foot log, a trim allowance of 4 to 6 inches is common. Many bucking cuts are angled, and the trim allowance allows the ends of the boards to be cut square at the mill to the desired board lengths.
When a tree is totally on level ground, the biggest problem during bucking is avoiding running the saw chain into the earth. When a tree is suspended at one end, the bucking operation becomes more difficult. In all cases, stand on the uphill side of the log and keep a firm grip on the saw with both hands. Also, keep a strong, even stance on the ground so you can move quickly if the log starts to roll.
A sawbuck can make bucking easier. It holds a log still at a good working height so that you can safely cut the wood to length. You can find plans for building a sawbuck in your local library or your chain saw owner’s manual, or you can purchase a sawbuck from a variety of sources.
Get access to premium content and more!

