If you’re sick of the sugar-packed goo that grocery stores pass off as maple “syrup,” then have we got a project for you!
Inside many deciduous trees is a goldmine of sap just waiting to be harvested and turned into all-natural syrup.
If you’ve never harvested maple syrup before, then you’ll want to check out our advice below. We’ll walk you through how to tap a tree, collect sap, and then process it into the tastiest syrup you’ve ever poured over pancakes!
But First, There’s Something You Need to Know
We sometimes use the word “sap” to refer to any liquid-y substance that comes out of a tree, but that’s not quite accurate. Trees can produce resin, sap, gum, mucilage, oil and fat, wax, and even latex!
These all have their uses, but for the homesteader, sap is particularly handy. We’ll focus on that today.
Maple Syrup Making: How to Tap the Sap
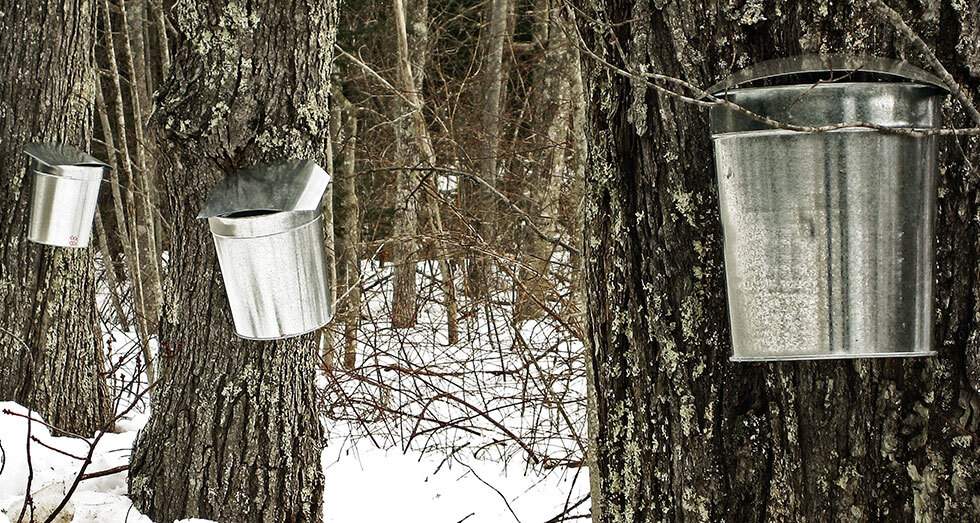
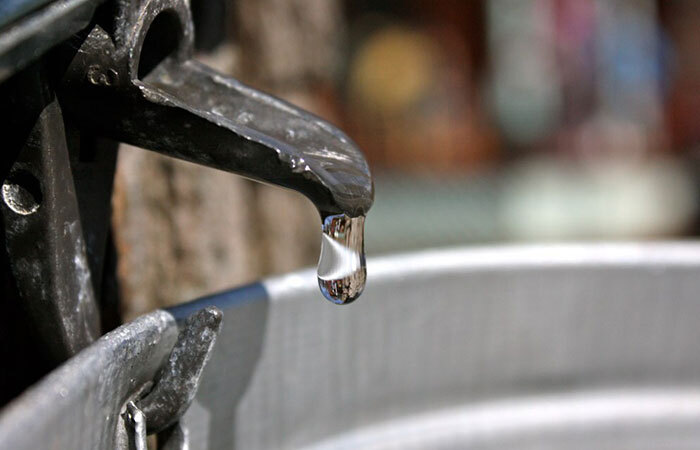
Simply put, sap is the stuff that makes syrup. It’s thin and watery and has a mild, sweet taste. Here’s what it looks like right out of the tree:
You probably know that maple trees produce sap (hence “maple syrup”) but lots of other deciduous trees including walnuts, birches, and sycamores do as well. These are all deciduous trees, and don’t produce resin.
HOW TO GET IT
You can actually order bottled birch sap for drinking (the wonders of the Internet!) but we recommend harvesting your own supply if you can. It’s one of the most productive cold-weather foraging crops there is.
MAPLE SYRUP-MAKING SUPPLIES
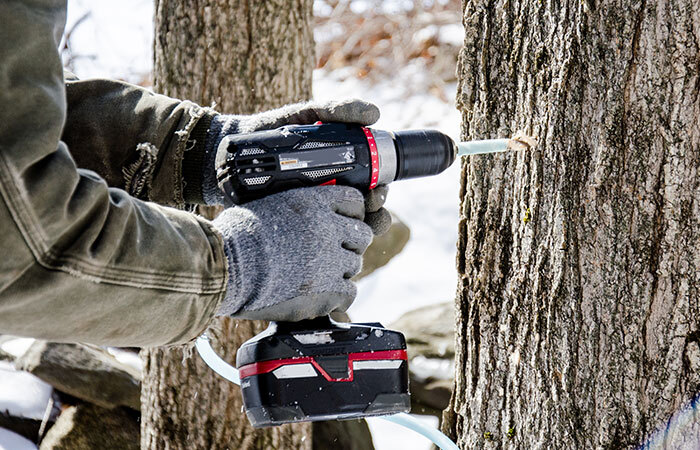
- Portable drill
- Clean 5/16 or 7/16 drill bit (food safe)
- Hammer
- Spile (also called a tap)
- Tube (optional)
- Large, food-safe container
DIRECTIONS
- Make sure your tree is the proper size for tapping—at least 10 to 12 inches in diameter. Trees between 20 and 24 inches can take two taps, and trees larger than 24 can take three.
- Drill at an upward angle into the tree, in a spot at least three feet above the ground and no closer than six inches from other tap holes beside them and two feet from tap holes above or below. Holes should be properly sized to the spile you will use: a 1 ½-inch hole for a 5/16-inch spile and a two-inch hole for a 7/16-inch spile.
- Insert the spile into the hole by hand. Once it sits on its own, gently tap the spile with a hammer or mallet until it is firmly in place.
- At this point, place your container beneath the tap. You need to find a way to keep debris and waste out of the container. We recommend a lid for your bucket. Simply drill a hole in the lid, attaching tubing to the spile and then running it into the lid hole. You can also find spiles with hooks for hanging buckets (which will also need a lid). Sap bags specially made for tapping are also a good option.
DOS AND DON’TS
- Do drill past 1 ½ inches on trees with extra thick, shaggy bark.
- Do pull out taps on trees that aren’t providing much sap. That may be a sign that the tree is too damaged or old for tapping.
- Do empty your buckets frequently—multiple times a day if the sap is flowing!
- Don’t tap in temperatures above the 40s and 50s because sap can go sour in warm weather.
- Don’t tap too high up on the tree—it makes collection more difficult and might require extra tubing.
- Don’t hang your bucket by a nail—you don’t want extra holes in a tree you’re tapping. Instead, hang it on the spile or place it on the ground and run the sap to it through a tube.
Maple Syrup Making: How to Turn Sap into Syrup
Sap has lots of uses. The most well-known one, though, is for syrup. Making excellent, natural syrup from the trees on your property is easier than you think. Here’s how to do it.
MATERIALS NEEDED
- A large multi-gallon pot for boiling (the large size saves time)
- A large burner. (Many people boil outdoors on a turkey cooker because of all the steam produced in processing.)
DIRECTIONS
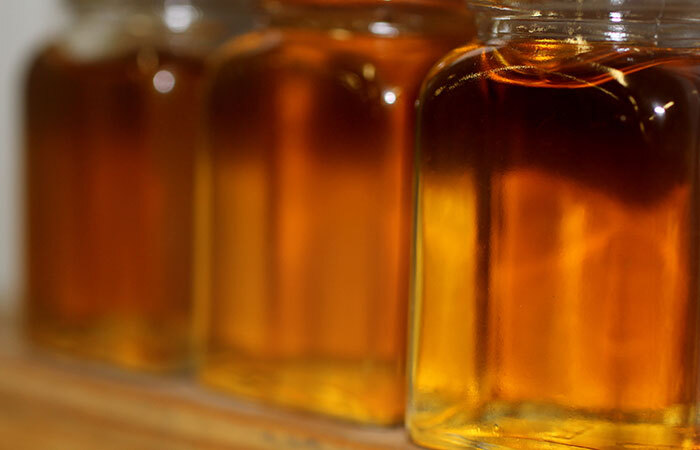
- Fill the pot ¾ full with sap. How long does it take to boil maple syrup? The first boil takes about four hours. Once it’s reduced down to ½ to ¼ of the pot, add more sap. Don’t let the boil stop! Continue to boil till the sap has reduced well down, is a golden amber color, and sill has a liquid consistency. Transfer to another pot.
- Complete the second boiling. This time, you’ll continue to boil till the sap becomes thick and syrupy and takes on a darker brown color that is recognizable as “syrup.” Watch the pot closely for boil overs. Once the second boiling is complete, let the liquid cool.
- Finally, get any debris out of the syrup using a filter. A cheese cloth will work. A coffee filter will also work for smaller quantities.
- Now it’s time to can your syrup! Using a sterilized jar and lid, pour in the syrup and refrigerate.
And that’s it. It takes a lot of sap to make syrup—about 10 gallons sap to one quart syrup, so get tapping!
Image Credits
“sap season” by looseends is licensed with CC BY-NC-SA 2.0. To view a copy of this license, visit https://creativecommons.org/licenses/by-nc-sa/2.0/
“Flowing Tree Sap” by RayS is licensed with CC BY-NC-ND 2.0. To view a copy of this license, visit https://creativecommons.org/licenses/by-nc-nd/2.0/
“US Grades of Maple Syrup” by LadyDragonflyCC – >;< is licensed with CC BY 2.0. To view a copy of this license, visit https://creativecommons.org/licenses/by/2.0/
Get access to premium content and more!