Plus 5 Extra Must-Have Items for Longer-Term Bug Outs
When it comes to putting together a “get out of dodge” (GOOD), “bug-out bag” (BOB), or even an “I’m never coming home” (INCH) bag, it is easy to get into the mindset of stuffing everything you could possibly need into a backpack.
The problem with this tactic, of course, is that you end up with a weight you’re not capable of carrying for even a mile.
Years ago Dave Canterbury, author of “Bushcraft 101” and “Advanced Bushcraft”, came up with a concept which he calls the 5 Cs of survivability. He later extended that to the 10 Cs and I believe these 10 should be the backbone of any survival kit, even for just a day hike.
More recently, good folks in the emergency prep community have altered and expanded Dave’s list to 15 items. One of my favorite expansions comes from the 1st Fraser Valley Pioneers. I’ll include some of those updates below.
When putting together a minimalist (or any) basic survival kit, consider these underlying categories for survivability. You might fulfill the recommended requirements in a number of different ways. That’s up to you. But it’s a great guideline.
Immediate Survival While Calling for Rescue
1. Cutting tool
2. Combustion device
3. Cover/shelter
4. Container
5. Call
Short-Term Shelter in Place
6. Cordage
7. Candling
8. Cotton material
9. Cargo Tape
10. Care
Longer-Term Shelter in Place (Bushcraft)
11. Combo Tool
12. Calories
13. Compass
14. Canvas Needle
15. Comfort
Now let’s take a more in-depth look at these 15 categories of survivability:
Immediate Survival While Calling for Rescue
1. Cutting Tool
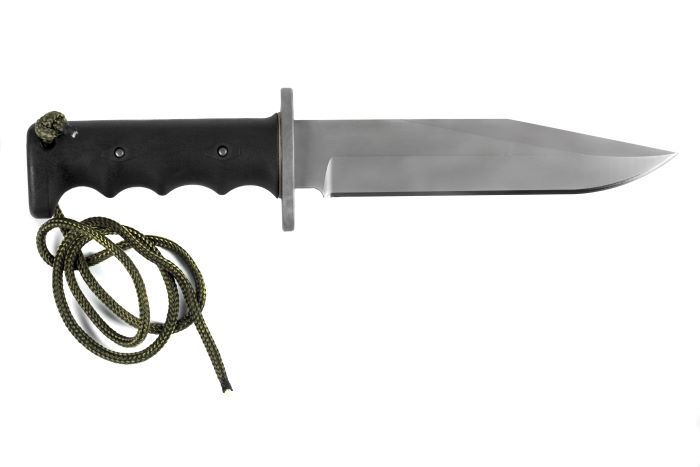
The cutting tool you carry should, at a minimum, be able to complete any and all tasks in the event of a total equipment failure. This is needed from any tool you choose. A tool for this task should be something that is not too large as you may need it for fine carving or food preparation.
To that end, it’s recommended to have a 5″ or 6” blade on a full tang survival knife. You could have a small hand ax instead if you are skilled in using it for delicate jobs.
It’s also recommended that your tool is made from high carbon steel and not stainless or other exotic metal as it needs to be as multi-functional as the rest of your gear (we will address this as we go).
The spine of any knife you choose should have a 90-degree flat ground spine so that it can be used for striking a Ferro rod. This saves you from using the blade for this function thereby conserving your resources and not dulling the blade unnecessarily. The reason for the high carbon steel blade is for sparking flint or other hard rock material on the spine to add in fire starting if other methods fail, get damaged, or become lost.
Remember that any items used for the kit must be multi-purpose so that you can eliminate unneeded weight and accomplish more with less. The “less weight” concept is to conserve resources like the calories (energy) spent to carry your kit, along with the hydration lost from heavy loads and sweating.
2. Combustion Device
The ability to build a fire is an essential survival skill and there are several tools that you can use to start a flame.
A lighter is a quick and usually easy way to start a fire, but fire is so important that you need to have at least two or three ways to start one.
A good device is a Ferrocerium Rod that will give off hot sparks even when wet, plus it will last a long time.
3. Cover/shelter
Your cover begins with the clothes on your back and any natural shelter that you can find. However, in cold and windy conditions, you will need more than that to stay alive. What you choose should be light and compact but multi-purpose.
It is ideal to carry at least a poly tarp of 8×10, a couple of 6 mil 55-gallon trash bag/drum liners, and an emergency re-usable space blanket. This small roll will give you tons of versatility and adaptability at a minimal cost. Other uses for these items include rain catchments, sleeping bags, ground coverings, rain gear, and signaling (if the tarp has an orange side).
4. Container
You need a stainless steel container with a wide mouth that holds at least 32 ounces of water. Your container should be sturdy enough to place in a fire to boil water and cook meals, and it needs to be leakproof.
If you don’t want to start a fire every time you obtain safe drinking water, you can also pack a filter system.
5. Call
If conditions are bad enough that you have to use your bug-out bag, then there’s a chance you’ll need to be rescued at some point.
For immediate emergency response, make sure to pack a signal whistle or mirror, or both, if there’s space. Redundancy is the height of preparedness (though it’s not always possible in a bug-out bag).
One other thing…if you pack a signal mirror, I recommend practicing with it. Pick a sunny day and repeat pointing the glare in the direction you want it to go. It’s a simple task, but you’ll be better off with the confidence of experience.
Short-Term Shelter in Place
6. Cordage
When they think cordage, the average person imagines 550 paracord, which isn’t a bad option. However, there is an even better option that weighs less, takes up less space, and is overall much more versatile.
I am talking about tarred #36 bank line cord.
Bank line is extremely versatile and can be used as trot line, decoy line. It can be used to make and mend, sew, and garden, too. The tar sticks to the string, not your hands, and it really holds a knot.
It comes in two types: twisted and braided, and while each has a place, twisted has more uses. You will want at least one hundred feet of whatever cordage you choose.
7. Candling

This category has nothing to do with wax candles but rather candle power. While a flashlight is ok, having a headlamp so you can be hand free is a much-preferred option.
Make sure you get one that is waterproof and not just water-resistant. Also, carry a spare set of batteries. If you have space and weight for it, a backup device that uses the same size batteries is also recommended.
8. Cotton Material
You’ll need a piece of cotton about three-feet square. Bandanas are the most common product made from cotton at that size. You’ll find it highly versatile when on your adventure. From carrying embers to use as a sling, the versatility of the cotton bandana is incredible. You can also cut it into strips for bandages, use it to wash up so your hands are clean, and even bind together twigs and branches for the fire.
Of course, you can always use it for what it was meant for: placed on your head to provide protection from the sun in case you lose your hat or cap. Dipping the cotton bandana into cool water and using it to refresh yourself can be quite welcome in hot weather.
9. Cargo Tape
Cargo or Duct tape may be the most versatile of all adhesive items you can carry. You’ll need a roll of at least two inches, preferably from a high-quality, respected brand. What makes cargo tape exceptional apart from its ability to bind together most materials is the fact that it can also be your tinder.
Cargo tape is flammable, and a small ball will burn for several minutes, allowing you to ignite larger materials for your fire. You’ll be glad you brought a roll along in case you get lost in the woods. Gorilla tape makes a good choice.
10. Care
Finally, we recommend packing as large a first-aid kit as you can fit. Make sure to include all the basics: gauze, rubbing alcohol, band aids, antibiotic ointment, etc.
Also, if you haven’t had the chance, now’s the time to take your first-aid skills to the next level. Get certified in CPR, the Heimlich, and basic wound care.
EXTRA! Longer-Term Shelter in Place (Bushcraft)
11. Combo tool
A good multi-tool is a must if you find yourself having to survive overnight or through multiple days.
I won’t elaborate on the many ways you might find a multi-tool useful in a survival scenario—I could write a book on the subject.
Suffice to say, your multi-tool should at least contain the following:
- Pliers (needle nose and standard)
- Serrated saw blade
- A straight edge
- Philips and flathead screwdrivers
- Scissors
12. Calories
Your bug-out bag will need to include at least 2,000 calories per day (that’s 6,000 calories for 72 hours.)
Luckily, stocking that many calories is easy with MREs or ration bars. The typical pack of emergency ration bars contains around 2,000 calories. MREs calorie counts can vary, but they should give you about 1,000 to 1,300 per pouch.
Once you pass 72 hours of food, though, I highly recommend adding some variety to your meals. Freeze-dried and dehydrated fruits, veggies, and entrees have the best shelf life and nutritional value for emergency scenarios.
13. Compass
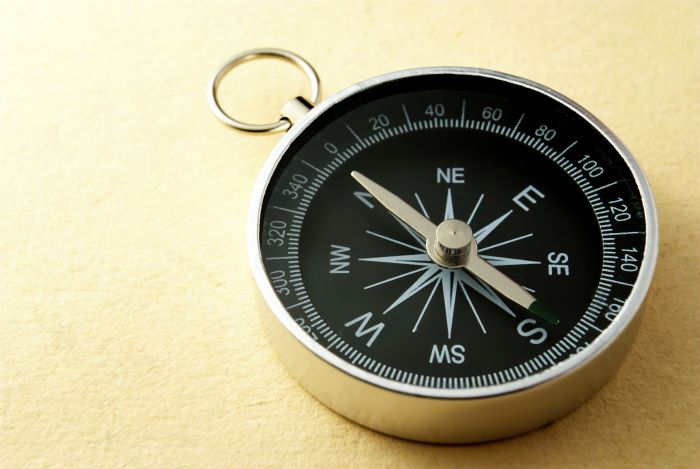
It helps to know where you are going, and a proper compass will keep you walking a straight line out of the wilderness. You can navigate without one, but I don’t recommend it.
There are compasses that offer magnifying lenses up to “5+” and greater, meaning you can use it to start fires as a third option to your primary combustion kit. If you don’t know how to properly use a compass look for YouTube videos on the subject such as this one.
14. Canvas Needle
A large canvas or cloth sail needle means that you can:
- Repair your clothing, cover, and tent canvas.
- If you magnetize the needle, you can use it as a backup compass.
- It can also punch holes in tough materials like awe, so you can make repairs.
- You can use it for medical needs, such as removing thorns, splinters, and stingers.
- You can even suture wounds if you have the right type of thread.
A #14 and a #10 needle are what is suggested.
15. Comfort and convenience
You can survive with just what is on the 15 Cs list, but for comfort and convenience you are going to want to include a few more things.
A good quality axe along with a bow saw is a good start. This will allow you to make improvements on your basic tarp shelter and make gathering firewood easier.
To make food prep easier you are going to want to include a Billy Pot along with a grill that fits inside it. Turned on its side with the grill in it, you can use use the pot like a bake oven. The grill can be used alone to cook on as well, and the pot can be used to boil water and to cook. A two-headed metal spork is also handy for cooking and eating.
And no list of conveniences would be complete without a sleeping bag or sleep system including a pad to help make sleep more comfortable. Don’t forget some entertainment to help you relax and fall asleep!
And there you have it: the 15 Cs that make up the basic backbone of any survival kit you build!
Get access to premium content and more!