


Oilcloth tarps are well suited for longer-term use, and because quality ones are made from high-thread-count cotton, they are fairly lightweight. An oilcloth tarp of 8′ × 8′ is easily manageable for packing and carrying.
The only real disadvantage to oilcloth is that it will burn if exposed to direct flame. Some oilcloths are heavier than others, depending on the type of cotton used in its manufacture, but good Egyptian cotton is light and durable. Make sure that you have tie-out loops and not grommets.
Why make it yourself?
What is currently being sold in stores as oilcloth is actually made from cotton fabric covered with a petroleum-based coating. However, genuine oilcloth (the real thing grandma had on her kitchen table) is made from cotton, canvas, or linen fabric coated in linseed oil.
Genuine oilcloth (also known as oilskin) is biodegradable in a landfill. The “real” oilcloth sold in stores today is made from PVC or polyvinyl chloride, and as such does not break down in a landfill.
Choosing & preparing your cloth
First you need to prep your cloth. 100% cotton works best. You can get canvas at Walmart, or by a canvas painters tarp at the Paint store or Harbor freight. Do not use the cheap 8oz canvas tarps, their weave is too open and they never close up. The best way to prep it is wash it in hot water and dry it on hot setting. This shrinks the fabric and closes the weave.
Making the waterproofing
You will need one quart of mineral spirits (You are not wanting mineral oil. Mineral oil will not work), which is available as paint thinner at Lowes, Home Depot or any home improvement store. You will also need a quart of boiled linseed oil. It is available at the same place.
Mix the mineral spirits and linseed oil 50/50. Shake it up good. You need the combination of chemicals. The linseed oil waterproofs the fabric and the mineral spirits allow the oil to dry. If you use straight linseed oil the fabric will never dry and will remain oily and sticky forever. (At this point you can also add concrete pigmint if you want color in the tarp.)
Waterproofing your cloth
Hang your prepared tarp from a clothesline or the back yard fence and paint it with the solution. Make sure it is fully covered and well saturated. Leave the tarp hanging until it dries. With the 50/50 mixture, it will take about 48 hours. It will take the smell about a week to disperse.
WARNING:
Linseed oil is flammable, so be careful not to expose the
waterproofing mixture or the treated tarp to direct flame.
Adding finishing touches to your tarp
If your cloth wasn’t hemmed before you sealed it you will want to do so. You can do this either on a machine designed for heavy stitching, or by hand using a sail-cloth needle.
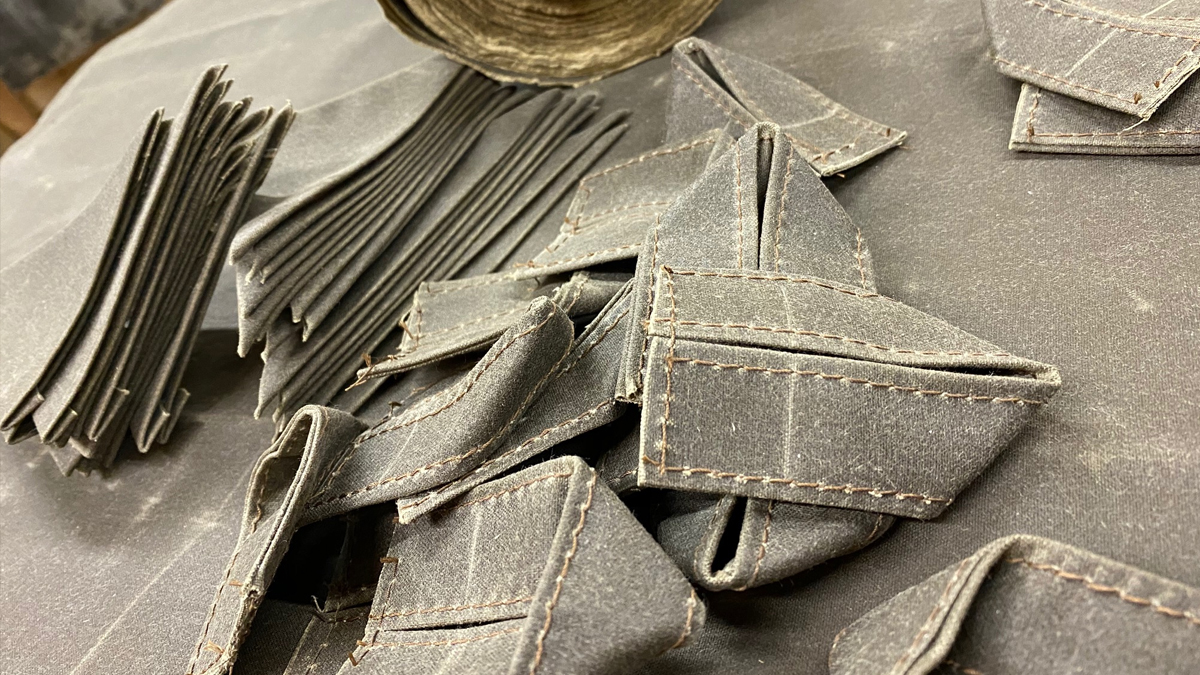
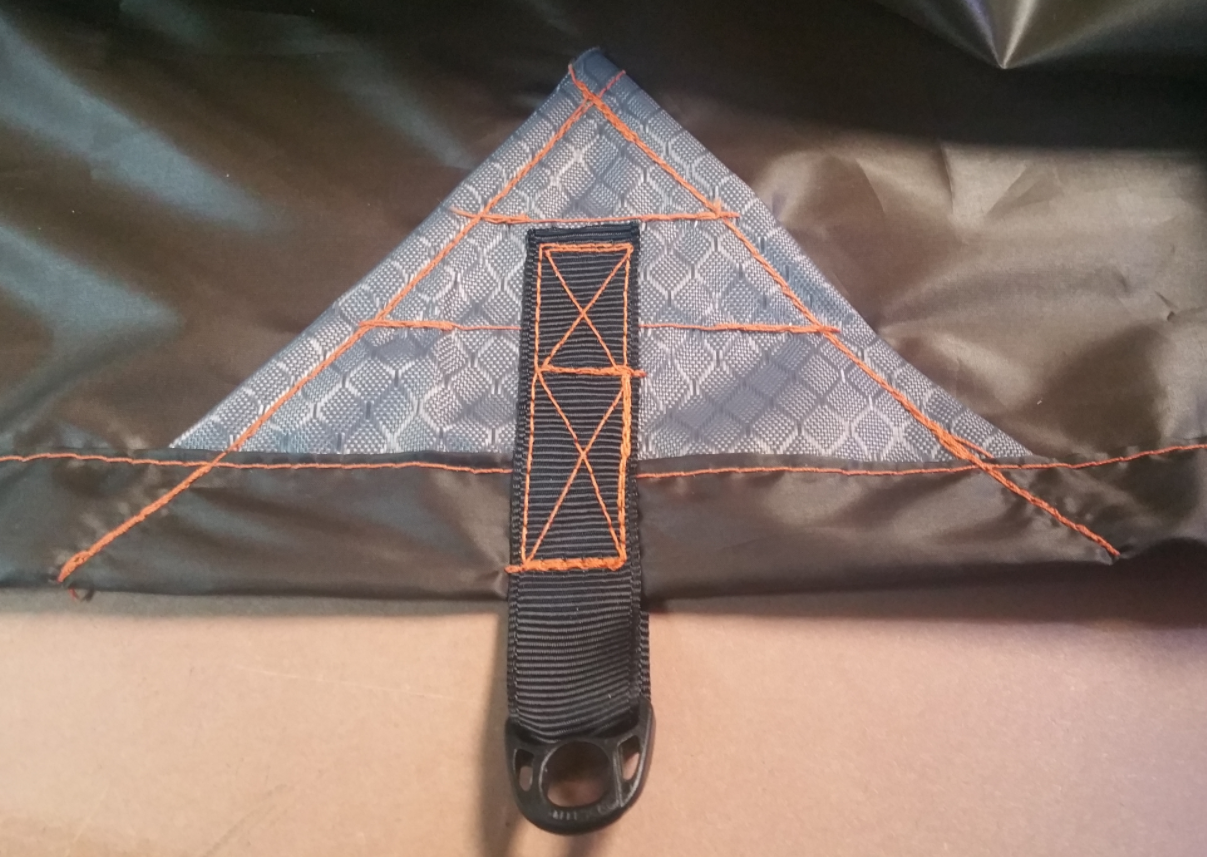
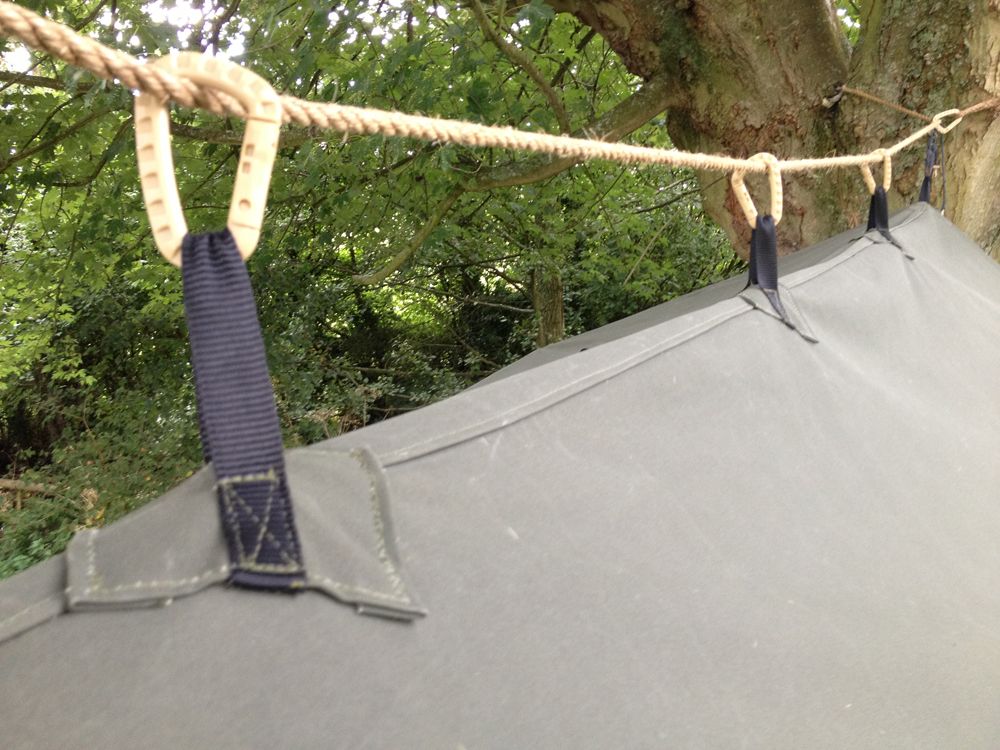
You will want to add tie-out loops (NOT gromets as they tear out to easily) to your tarp as well. Tie-out loops should be spaced every 2′ around the entire perimeter of the tarp and also evenly spaced down the center seam.
Tie out loops come in a great variety and some include D rings built into the loops. You will want strong webbing for your loops and they must be reinforced with additional cloth and strong stitching such as shown below.

Get access to premium content and more!

