

This Functioning Stove Can Be Made from Items You Probably Already Have Around the House
Sometimes, homesteading requires a little bit of “duct-tape-and-wire” know-how. If you can reliably improvise solutions to everyday problems, life gets a whole lot easier.
Today we’re going to show you one of our favorite improvised home skills: making a functional stove from little odds and ends almost everyone has around the house, including a soda can, a push pin, and a penny.
ITEMS NEEDED
- 2 aluminum cans (thicker is better)
- Pair of scissors
- Small block of wood, about two inches high
- Pushpin
- Penny minted in 1982 or before (more on this later)
- Small pair of needle nose pliers
- Denatured alcohol like isopropyl alcohol
- Some insulation
- Large, single-piece jar lid
INSTRUCTIONS
1. Score the Cans. Set the block of wood and one of the aluminum cans side by side. Place the pushpin on top of the block of wood. Align the plastic edge of the pushpin with the edge of the block so the pin protrudes out past it.
Holding the pushpin firm, use the tip to score a line two-inches high along each can. This scored line marks the place you’ll cut with your scissors a little later on.
2. Make Holes to Pour in Fuel. Place one of the cans upside-down on a hard surface. Using the pushpin, make five holes in the bottom of the can.
The center hole should be larger than the surrounding ones; you can widen it with the pushpin. Place the pin in the hole, angle it so it’s pushed firmly against the edges of the opening, and then rotate the it in circles. The pressure of the pin against the edges of the hole will widen it out.

3. Make Venting Holes for Flames. Next, you’ll want to create holes between the inner and outer rims on the bottom of the can. These will be the stove’s flame vents. Using the pushpin, puncture sixteen holes. Start with one hole on the left and one on the right, then one on the top and one on the bottom.
After that, puncture holes in each of the corners, in an order similar to what’s depicted below. Finish out the final eight holes in any order.
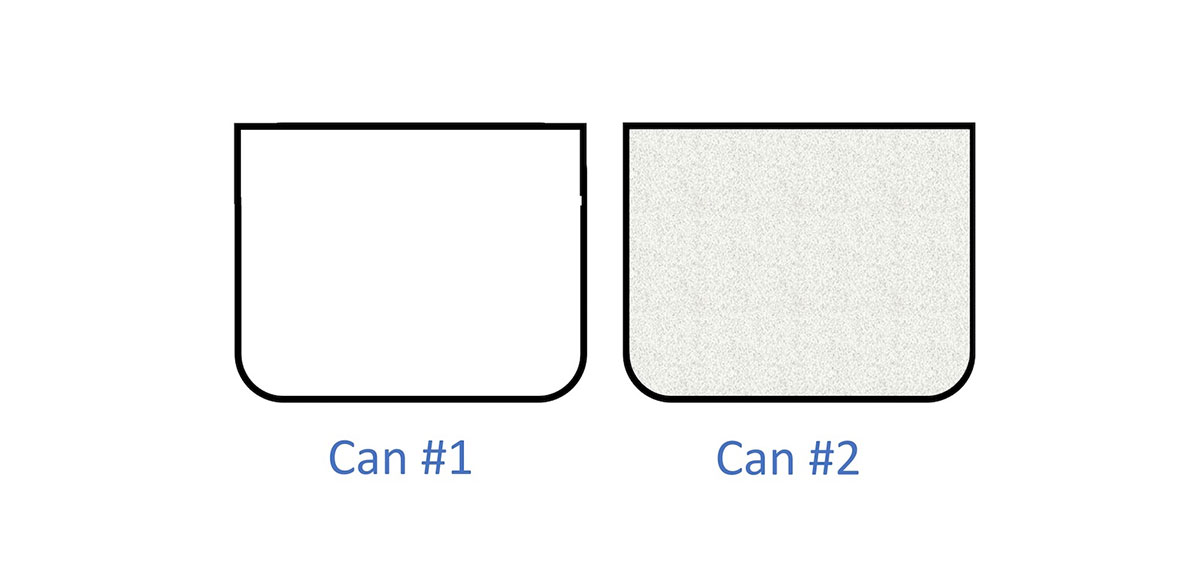
4. Cut the stove. With all the holes in place, you can now cut out the stove. Use scissors to snip along the scored line of each can. You should end up with two pieces of aluminum that are about the same size.
5. Crimp for fit. Using your pliers, crimp the edges of one of the aluminum cans. To do this, squeeze the open edge with the pliers and then gently twist to one side, creating a small bump—or “crimp”—in the can. Repeat until the entire edge of one can is crimped.
6. Stuff with insulation. Take a portion of insulation and stuff it into the crimped aluminum can. Fill the can nearly to the top with insulation. This will absorb the fuel and act as a wick to prevent spilling.
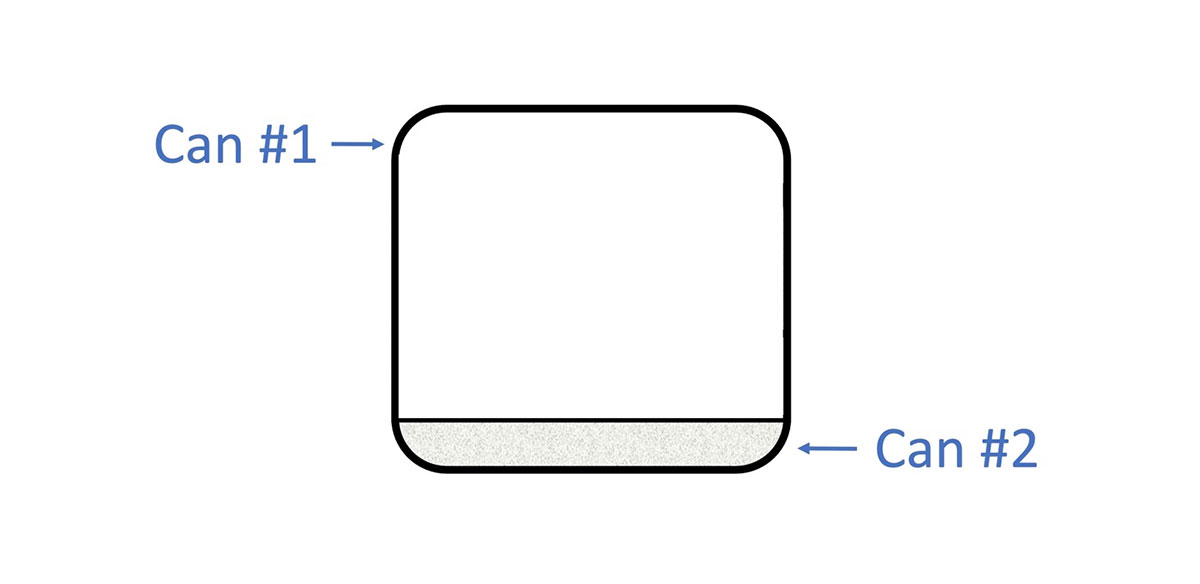
7. Put the stove together! Fit the two pieces of the aluminum can together. The crimped piece should fit easily inside the round piece. If you’re planning on carrying your stove around or re-using it frequently, you can affix the two pieces together with high-heat epoxy. This isn’t necessary, but it will make the stove a little more durable.
8. Set up the stove. Place the jar lid upside down on a hard surface—this will act as a kind of bowl to fill with fuel. (To prevent leaking, use a single-piece jar lid, not the two-piece variety with a separate rim and lid.)
Set the stove in the center of the lid.
9. Light er’ up! Pour just a bit of fuel into the jar lid. Then pour fuel into the top of the stove. Let the fuel empty into the holes, then fill it again.
Now it’s time for the penny! Place it on top of the large center hole in the stove. This will create pressure and vent the flames through the 16 holes in the rim.
NOTE: Make sure to use a penny minted before 1982—they’re made mostly of copper. Pennies after that year contain lots of zinc, which will melt in the heat of the flame and ruin your stove.
With that, your stove is ready to use! It will boil water in about 10 to 15 minutes and make simple meals without a hitch.
A word of warning: mind the size or your pot. Smaller is better…you are dealing with a tiny stove made from a soda can, after all.
Happy cooking and bon appétit!
Image Credit
“Beer can stoves under construction in Anzere, Switzerland” by Robert Thomson is licensed with CC BY-NC 2.0. To view a copy of this license, visit https://creativecommons.org/licenses/by-nc/2.0/
Get access to premium content and more!

